
Variable Star Quilt Block Tutorial
Now that I’ve posted tutorials for how to make quilt blocks and half square triangles from scratch, and how to make quarter square triangles, I can begin sharing some quilt blocks you can make with these shapes. My plan is to post these quilt block tutorials regularly and build a little quilt block library. If you’re new to quilting please be sure to read through the two posts I linked above before diving into this tutorial. Those posts explain the most basic fundamental skills such as using a 1/4” seam allowance, and the terms finished and unfinished sizes amongst other basic quilt block making concepts and skills.
To commence this series today I will share the traditional quilt block Variable Star, otherwise known as Ohio Star. Note that many traditional quilt blocks often have multiple names which can be a little confusing. The Variable Star block is a 9-patch block meaning it’s made from 9 patchwork pieces. In the photo below you can identify the 9 shapes within the block:
5 squares—4 tan colored squares in the corners, and one print square in the center
4 QST’s (quarter square triangles)— sage, white and tan colored

The QST’s for the Variable Star quilt block are made from 3 colors as shown below. I explain how to make QST’s in 3 colors toward the bottom of the previously mentioned QST tutorial post.
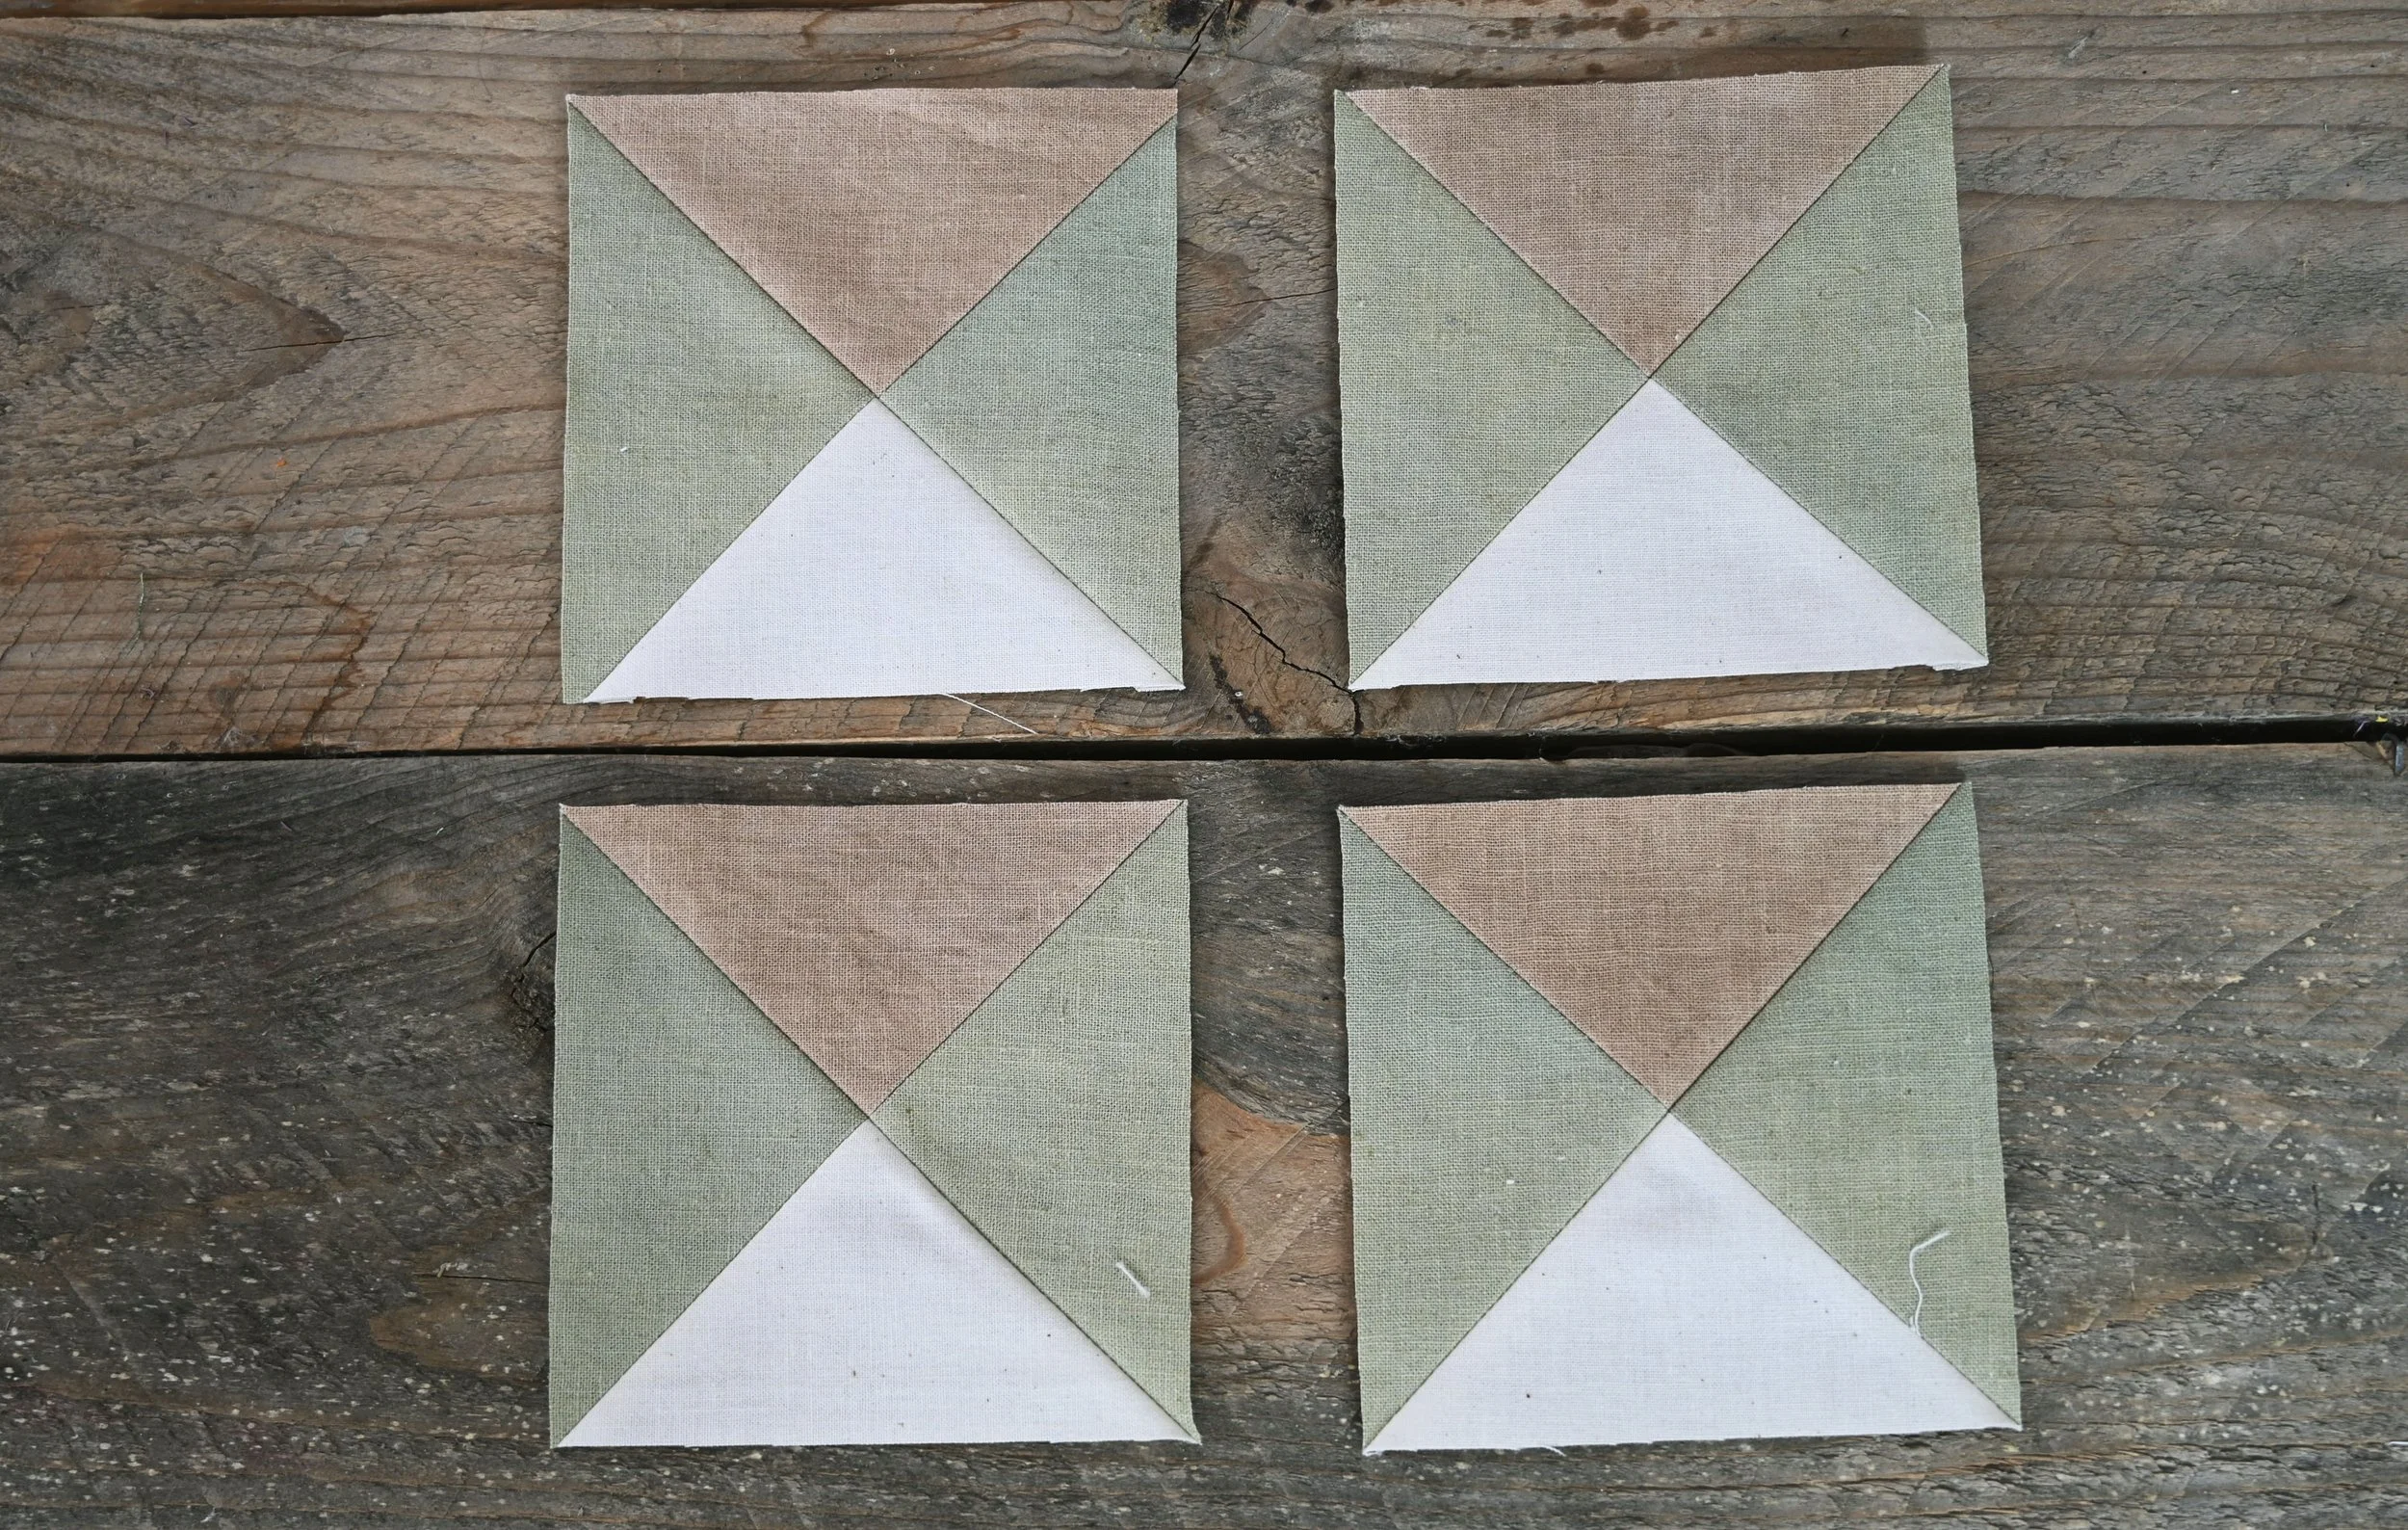
The Variable Star block shown in my example is a 12” finished block. That means that the squares and QST’s that make up the block are each 4” (finished size). The 5 squares within the block were cut to their unfinished size of 4.5” and the 4 QST’s were made according to the formula and instructions I shared in the QST tutorial, and trimmed to 4.5”.
You can make your block in any size you desire by simply changing the size of the shapes within. For example if you want to make a 9” finished block, the squares and QST’s within the block are 3” (finished size). If you want to make a 6” finished block the squares and QST’s within the block are 2” (finished size). Once you determine the size to cut your pieces by referring to the formula in the QST tutorial, go ahead and cut your squares and make your 3 colored QST’s. Don’t forget to trim your QST’s to their unfinished size as shared in the tutorial. Once your squares are cut and your QST’s are made, arrange the pieces on your work surface orienting them correctly, and sew them into 3 horizontal rows.

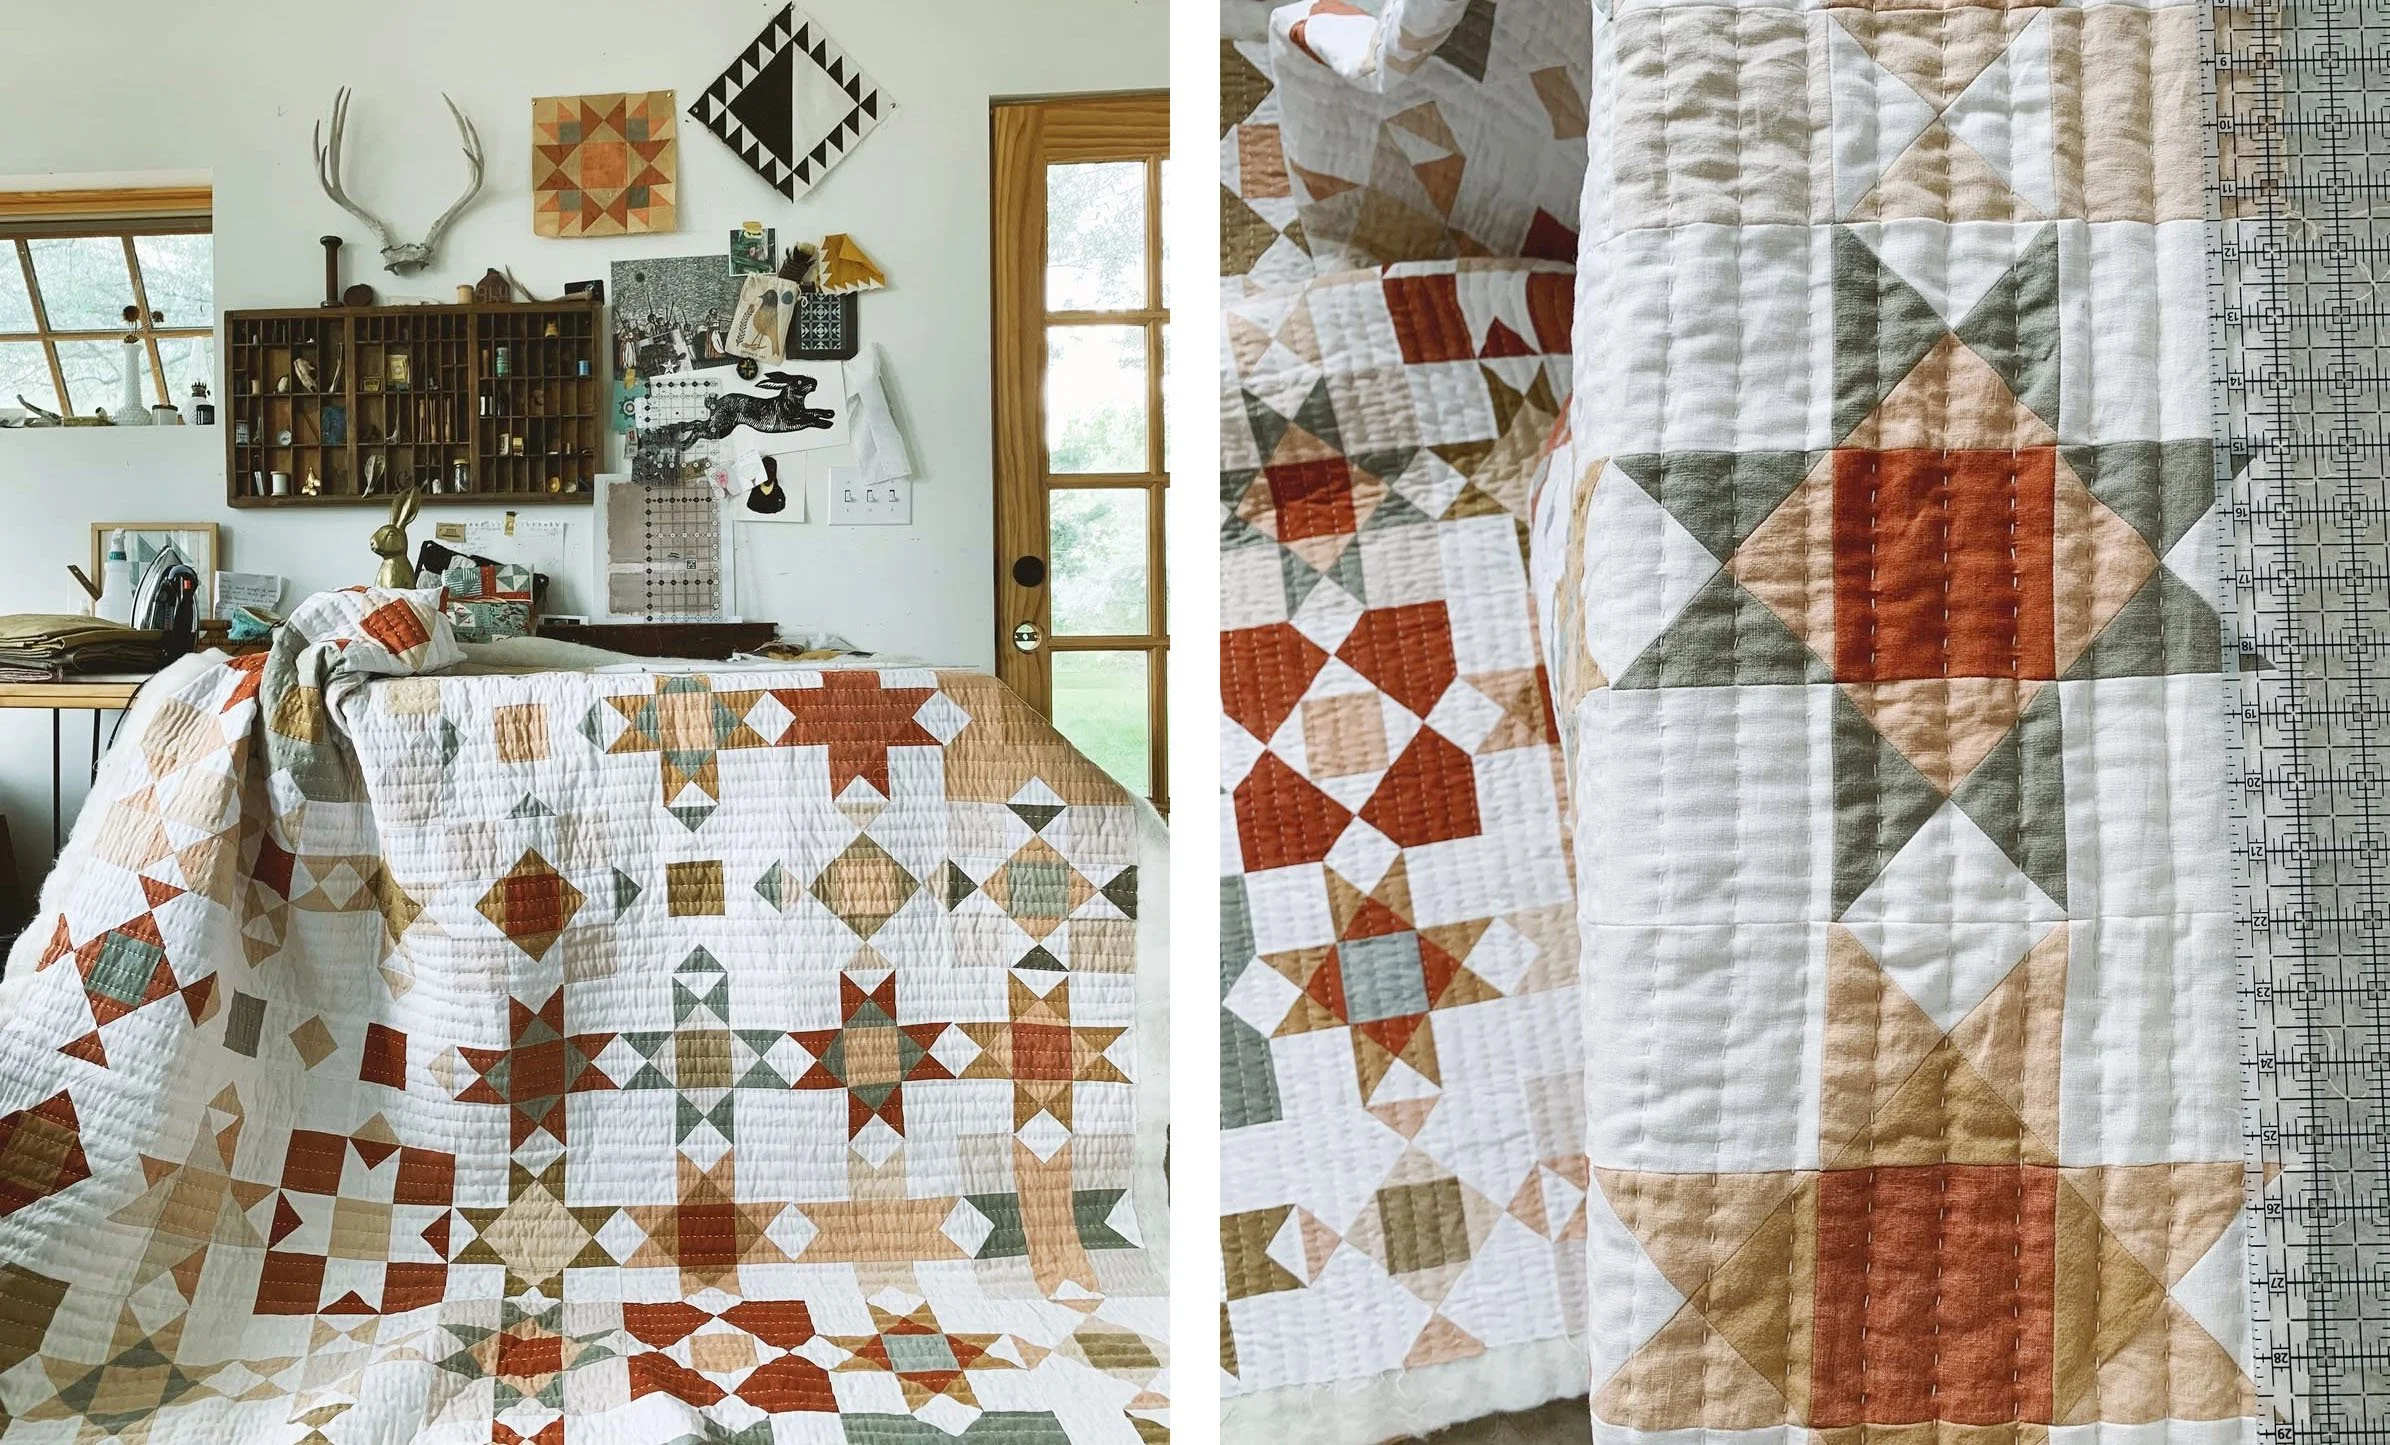
Now pin the rows together matching at the seams and sew the rows together to finish your block. I explain how to match seams in this post if you need help with that part. Also my book Farm & Folk Quilt Alchemy contains detailed instructions for everything mentioned in this post plus more. I have signed copies available here or you can order it from your favorite bookseller. Below you can see a Variable Star quilt I made for my daughter. It’s such a fun and versatile block. As you can see, you can change the look of the block tremendously by changing up the color placement of the pieces within the blocks.
I’ll have another block to share soon! Let me know if you have any questions in the comments.